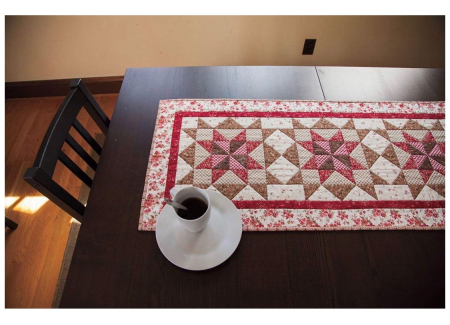
Thanksgiving Table Runner Day 3

I always get a bit excited as I see the pieces of the puzzle coming together. And today, we will almost be finished with the 3 main quilt blocks for the table runner

Looking at the first image in this post, we are going to take the two center rectangles and pin them (right sides together) to the square pinwheel. There’s a trick to this, and no matter how many years you’ve been quilting, getting it perfect every time is nearly impossible. But, I know I keep trying. When pinning pieces together like you see above, start pinning in the middle, lining up the point (look where the yellow pin is located) to the seam of the pinwheel (see the first image). Then line up and pin the outer edges. The larger the quilt block gets, the more seams there will be to line up. I’ve taken great care to line up points and seams perfectly, and they still are off at times. If you don’t have patience, quilting will drive you nuts. But if you love quilting as I do, I think of every mistake and do-over as a part of the process. Again, the end result will make it all worth it. Promise.

After pressing the sides open, you can see that most points and seams are lined up nicely. If I really wanted to be picky, I would have corrected the top right of the pinwheel. Forget it. It happens. I’m not a perfect quilter. Maybe these imperfections give it a bit of character.

As I complete the piecing, I end up with 3 “almost” completed quilt blocks

Beginning the piecing of another set of rectangles and squares, remember how important it is to mark the diagonal line on the squares, and stitch down that marked line.

After stitching the rectangles and triangles together, trim to a 1/4″ seam as shown

Press them open and they should look like this.

Add a square to the other side and stitch along the marker line

Trim and press open and they should now look like this

Taking the remaining squares as indicated in the instructions, place the two squares together (right sides together), and stitch 1/4″ on both sides of the marker line. After you are done, using the marker line as a guide, trim the pieced squares into triangles.

Press them open and trim the corner tabs

Sew the pieces together, lining up seams and points, and you will have this nice long rectangle.

For those that don’t know, I am making the“Adelaide” table runner kit offered by “Connecting Threads” . This is a sew-a-long with me project. You can order your kit online, and when you get it, just pop on back here and we can sew together.