

How to Make a Ruffled Pillow
When it comes to your home, we all want comfort, but having elements of beauty around the home can be costly and expensive. So, when you are on a budget like we are, sometimes you have to dig into your fabric stash, rip up some old, worn-out pillows, and create something new and beautiful. Pillows have a way of adding color, design, and good style to any room. With the right fabric and several hours of your time, you can make over a chair or entire sofa simply by adding a pretty pillow sham to a pillow or two. And, today, I am going to show you how to do just that!
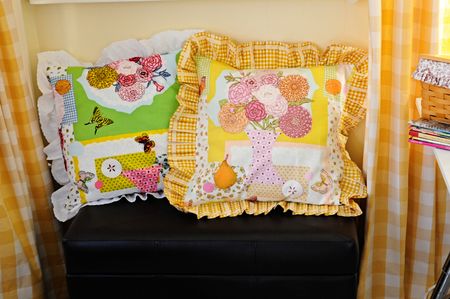
I am preparing to send images to Studios Magazine for my feature in the summer issue coming out this June. I’m so excited! I wanted to add some fabric touches and design elements to my sewing studio and after I got the drapery panels hung, I couldn’t wait to restore my Gloria Vanderbilt pillows that are 41 y/o! But, after tackling that project, I decided to make several ruffled pillows for my room out of fabric I already had in my stash.
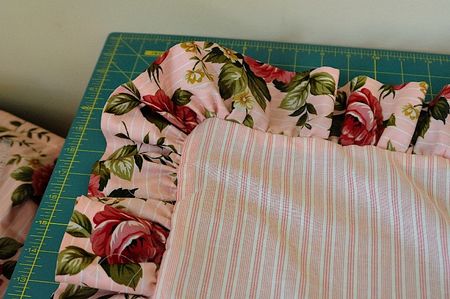
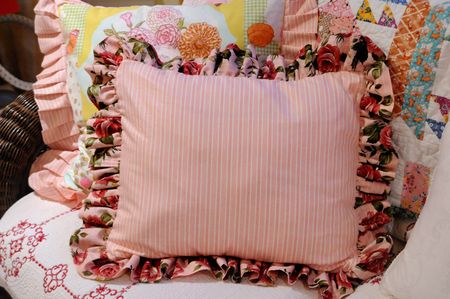
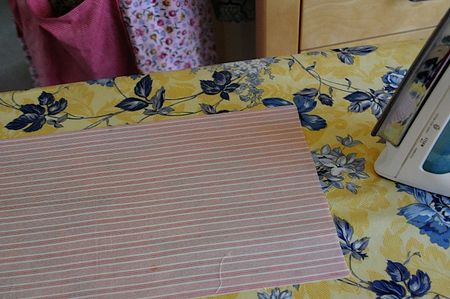
With that said, I picked out some pretty pink striped fabric for the pillow sham and floral fabric for the ruffle.
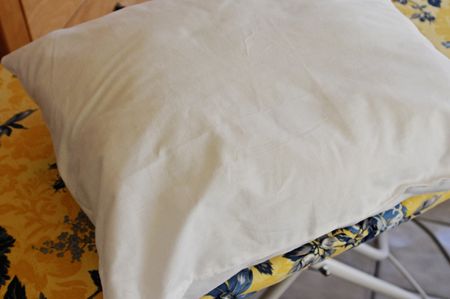
1) First step, though, was making the pillow. I pulled out some white muslin fabric, pressed it, and cut 2 rectangles – 17 x 20 inches each. I stitched around all sides, leaving about an 8 inch opening in the middle of one side for stuffing the pillow, then I stuffed it with polyfill that you can find at any fabric or craft store – or rip open that old flat pillow of yours and re-use the stuffing inside! After you stuff that new muslin baby, sew the opening together. You don’t have to be perfect when making this muslin pillow. It is simply easier to get the pillow in and out of the sham when you have to wash the pillow sham you will be making next.
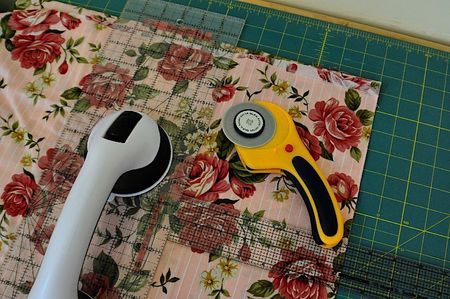
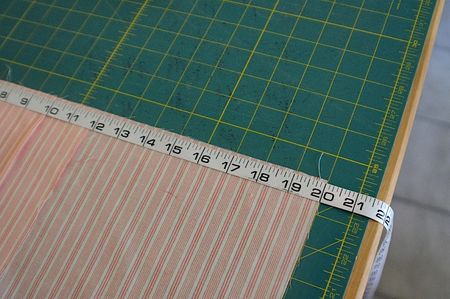
2) If you are like me, you like lots of ruffle. I pressed and folded the fabric I wanted to use for the ruffle and rotary cut a 7 inch strip – 2 times the diameter of the pillow – 17 + 17 + 20 + 20 = 74 inches. So, my ruffle strip needs to be 7″ by about 148″ or thereabout. In my case, the strip I cut was 7″ x 140″ – close enough.
I stitched 2 pieces of 7″ strips together to equal the 140″ total length, using a 1/4″ seam. Press open the seam. Then press a 1/2″ seam on each end of the strip so that you have a finished edge on both ends of your ruffle. No raw edges!
3) Fold your 7″ strip in half and press so that the ruffle is now 3-1/2″ wide. Make sure you line up the edges of your strip evenly. I have a serger that I use to clean up my edges, which is exactly what I did after folding the 7″ strip in half and pressing the fold (wrong sides together. You do not need to serge your raw edges unless you want to. It is just an extra step I take when making things.
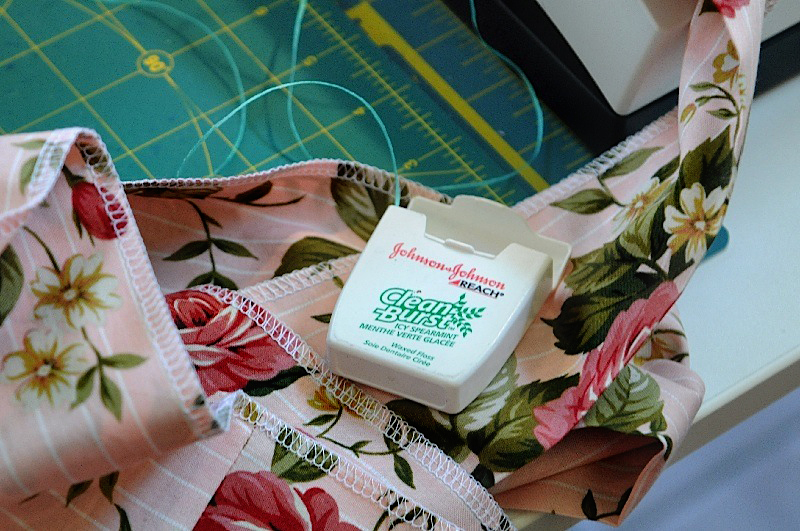
Now for the gathering of the ruffle. I do not use a gathering foot on my sewing machine. I find they don’t gather as much as I want them to. That said, I grab my waxed dental floss to do the trick.
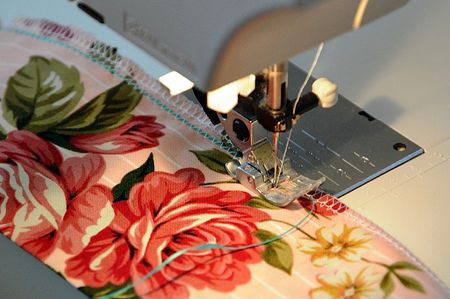
4) Simply place the dental floss on your fabric near the raw edge (leave about a 7″ tail at the beginning to pull in a later step. Set your sewing machine for a zig-zag stitch and begin stitching over the dental floss, being careful not to accidentally stitch the floss.
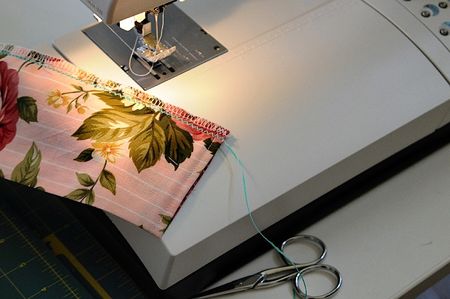
5) The idea is to encase the floss within the zig-zag stitch, leaving about a 7″ tail at both ends of your ruffle project. Notice my finished edge on the end of the ruffle? This is what I was explaining in step 2 – about finishing your raw edge.
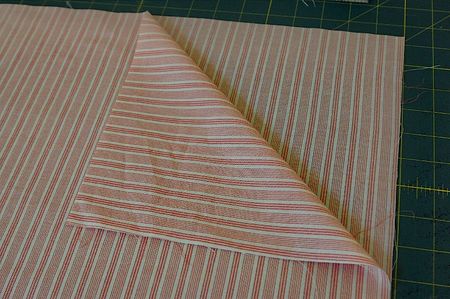
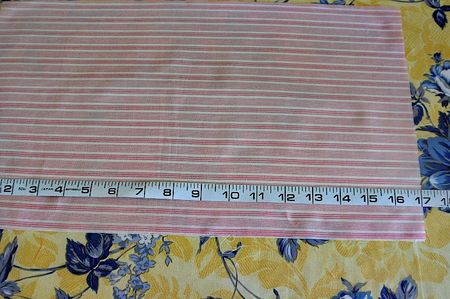
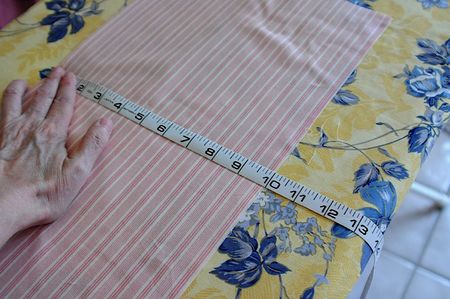
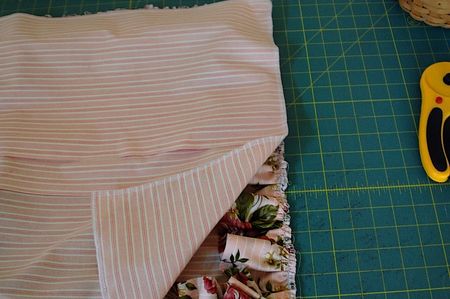
6) Cut 3 pieces of your pillow fabric (yes, you heard me correctly – 3 pieces) 17″ x 20″
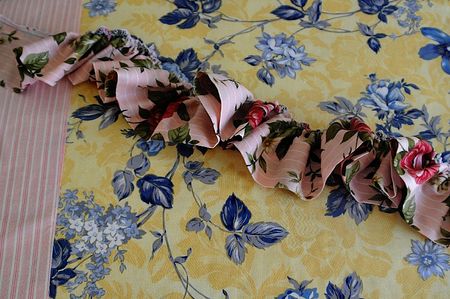
7) Then start pulling from one end and move the ruffle down to about the middle of your ruffle strip. Next, start pulling the floss on the other end of your ruffle strip and adjust the ruffle to the middle of your project till all of your ruffle is made. Don’t worry about the length of your ruffle as you will have to make adjustments so that it fits your pillow project perfectly.
Isn’t the waxed dental floss great!!! Not only does it “not break,” but it pulls so easy!
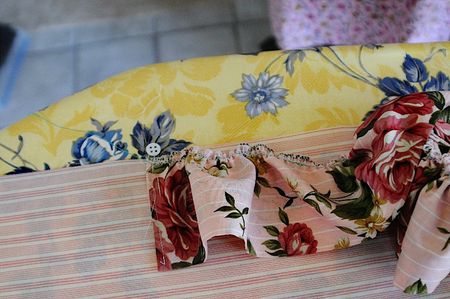
8) Place your ruffle in the center of your pillow front fabric square. Make sure you are pinning the raw edge of your ruffle to the right side of your pillow front fabric. Always begin your ruffle in the center of a side and not in a corner. Your project will look better in the end.
9) Work your ruffle around the corner (rounding the corner) of your pillow front fabric square. This part of the project takes patience, because you have to pin and adjust, unpin and adjust, pin and adjust the ruffle …
10) As I am adjusting the size of my ruffle and becoming frustrated with my sore neck and shoulders, I pin the center of the ruffle directly opposite where I started the ruffle on the pillow fabric. I do this so that I will have an even ruffle all the way around the pillow.
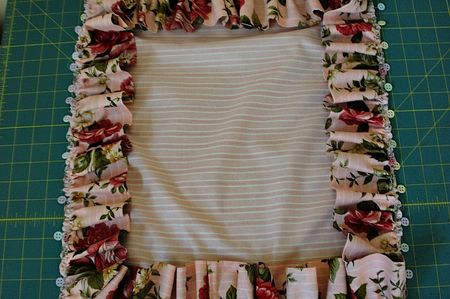
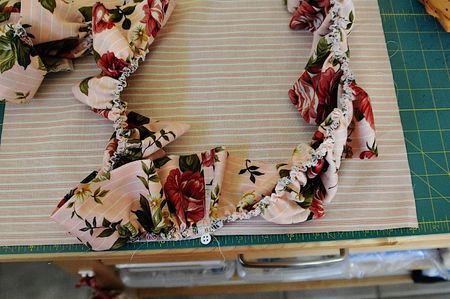
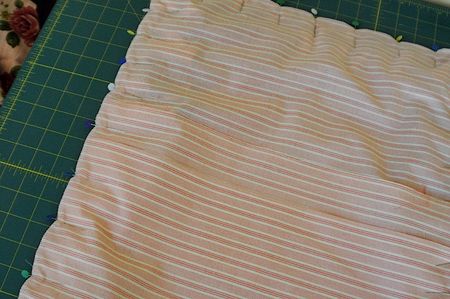
11) My ruffle is now pinned all the way around the right side of the pillow front fabric square. I think this is the most tedious part of the entire project.
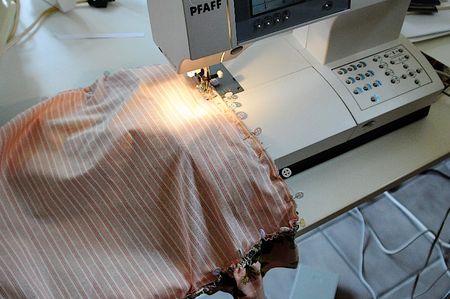
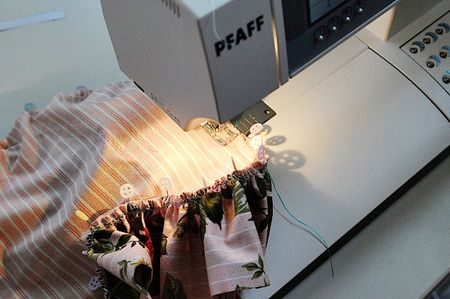
12) You can place your ruffle down on your sewing machine like you see above, or you can sew with the ruffle up. It is a personal preference. I like to sew with the wrong side of my pillow facing up. Why? Well, to avoid a lot of cussing and fussing. When I sew this way, I know I am sewing a perfect seam allowance around the ruffle and the pillow fabric. I do have to adjust the ruffle underneath from time-to-time, but overall, I find it easier. Also, when you come to a corner, be sure to “round” your corner, following the curve of your ruffle.


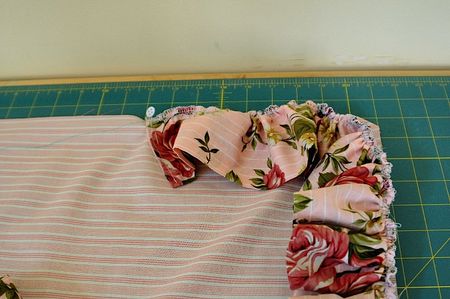
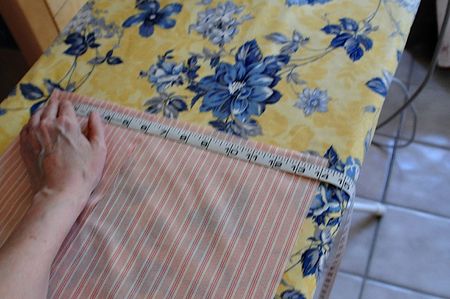
13) You have 2 pieces of pillow back fabric squares. Each are 17″ x 20″. Make sure they are pressed.
14) Take one of the pillow back fabric squares and fold it in half along the long edge – wrong sides together.
15) The fabric piece should be 17″ …
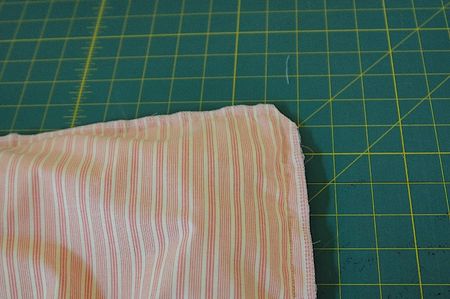
16) The other pillow back fabric square will be folded down about 6″ from the top and pressed. The finished size will be 17″ x 14″.
17) Place the 2 back panels together, folded edges overlapping one another, and adjust them together until they are, together, equal to 20″ so that your pillow back will be 17″ x 20″ finished.
18) Pin and then stitch the 2 back panels together, then pin it (right sides together) to the front panel with the ruffle, matching corners and centers. Be sure to pull the ruffle towards the center so that it doesn’t get bunched up in the corners. If you only knew how many ruffled projects I’ve had to rip seams out of!! Ruffles have a way of getting caught in the sewing in ways you never thought possible.
19) Turn your project right-side-out and check to make sure you haven’t sewed over a part of the ruffle you shouldn’t have, and if your corners are looking rounded and good, then flip it wrong-side-out again and this time clip your corners to eliminate the bulk.
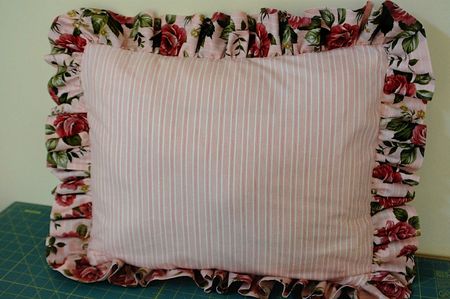
20) Stuff that pillow inside and wah-lah!! Now that’s a pretty pillow.
And it looks especially nice on my sofa don’t you think?
Hope you enjoyed this project! Now, go make some beautiful pillows for your own favorite chair, bed, or sofa.

Comments (3)
Kristi M
September 18, 2012 at 8:58 pm
Great tutorial! Thank you. I am going to try to replicate an embroidered pillow for my daughter using a pillow my grandmother made me 30 yrs ago. Was not sure at all how to do the ruffle…and this spells it out clearly! So glad you shared!
Dianne at My Southern Heart
March 14, 2012 at 9:01 pm
Wonderful pillows and I LOVE the dental floss idea!!! Thanks for the tip!
Joanne
February 25, 2012 at 5:00 am
Great tutorial. Thank you for the inspiration.