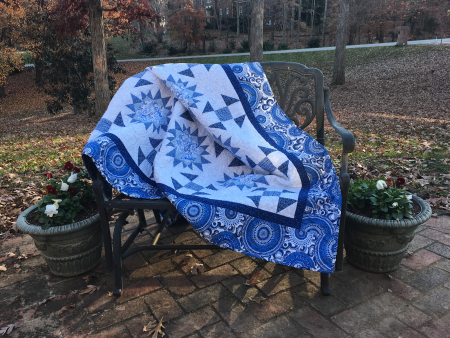
Mother’s Double Dutch Quilt Part 3
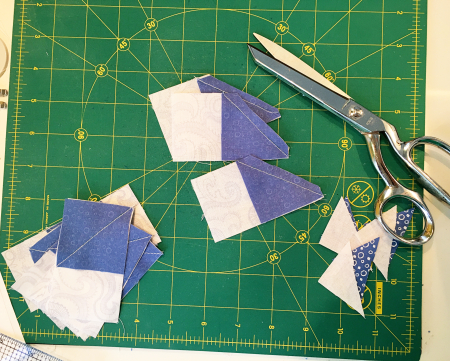
I’ve been a busy bee today working on Mom’s quilt as her gift this Christmas. This is the Double Dutch Quilt in beautiful blues and whites from ConnectingThreads.com. Love that site! Moving right along, you will have pieces that are rectangular and pieces that are small squares. Place them per the instructions on one side of the rectangular piece. Sew along the marked line you place diagonally on the back of the small square, and then clip off to a 1/4″ seam allowance.
When you are done, press the seam open towards the dark piece so that you have a rectangle that looks like this
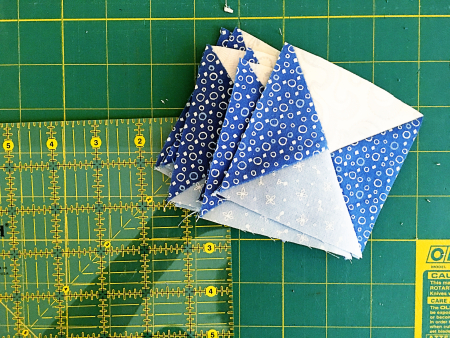
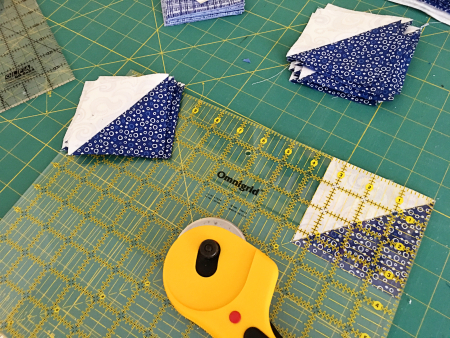
Now grab these squares you made earlier and had set aside, and clip off the 4 corners from the seam. Those little triangular bits that are in the way.

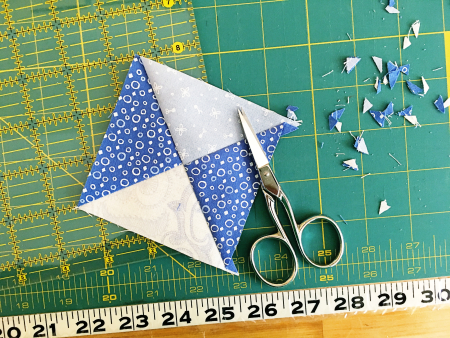
When you are done clipping the corners, using your “Omnigrid measuring square,” place it on top of each of your blocks. Check your “right angles” and the dotted line that is angular on the omnigrid, should like up with the seam of your triangle. You do NOT want to trim to a 3 1/2″ square only to discover that the triangles are not at right angles. That is why I posted this picture. I have the square at perfect right angles for 3 1/2″ – BUT, I first also made sure the angled line goes through the middle of the seams of the triangles.
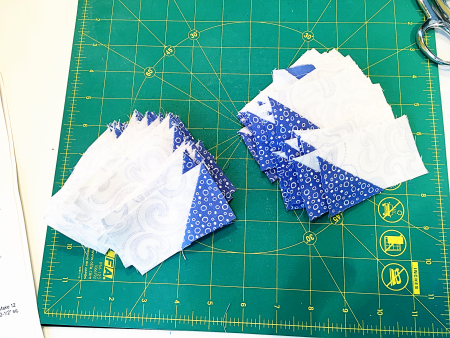
Now that you have your triangles in measured squares of 3 1/2″, you are ready to piece!
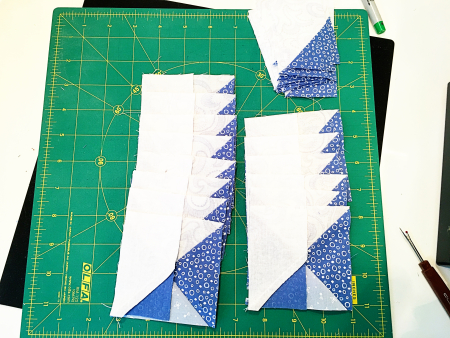
Following the pictures and instructions that come with the pattern, place the pieces together and line them up. No pinning is really necessary unless you feel more comfortable doing it that way. I’m ready to sew my train of pieces together.
I sewed one side, and now I am sewing the pieces together on the other side of the 3 1/2″ square. If your seams don’t line up, you probably missed a trimming step with the squares.
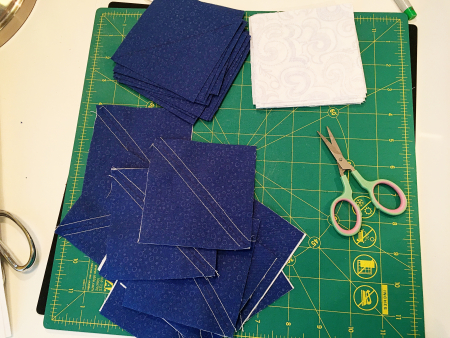
Moving on to other pieces of the puzzle, I grabbed two piles of larger squares. I drew a diagonal line on the back of the darker piece, placed it on top of the lighter square piece, and sewed a 1/4″ seam on both sides of the line I drew on the darker square. Then I cut the pieces in half along the diagonal marker line between the two seams.
Press open your new new squares and repeat the process above for making each square at right angles, making sure that you also line up the diagonal line along the diagonal seam on your block. Love the Omnigrid for helping me to create perfect right angles. Well, maybe almost perfect.
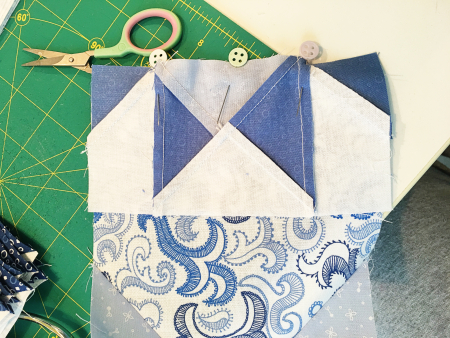
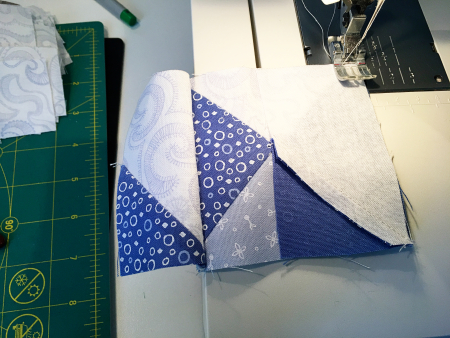
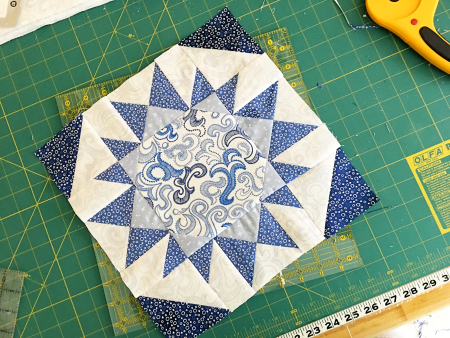
Remember the first piecing we did with that big square and the four smaller squares? Well, pull that piece and start piecing together for your first completed quilt block! Now, this is very important!! Using pins, make sure you line up your seams on both pieces. This way, when you press them open, the points and seams should line up nicely between the two pieces.
After you’ve done that, you will want to press your pieces open and check your points. Looking good!
I am repeating this process on the other sides of the center square. Match up all seams!!! Pin each seam!!!
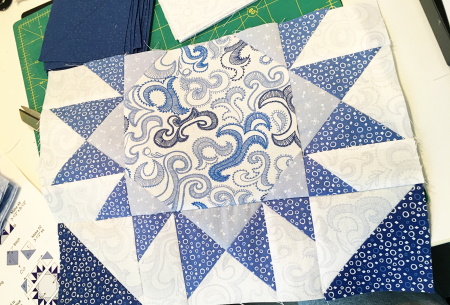
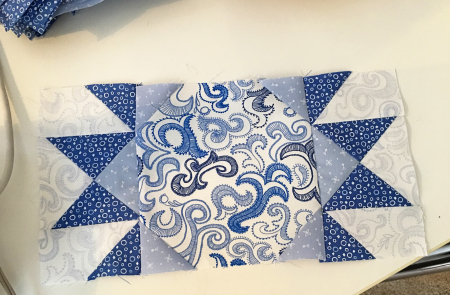
I’m loving what I see!! I think my points and seams look pretty darn good after pressing this open!
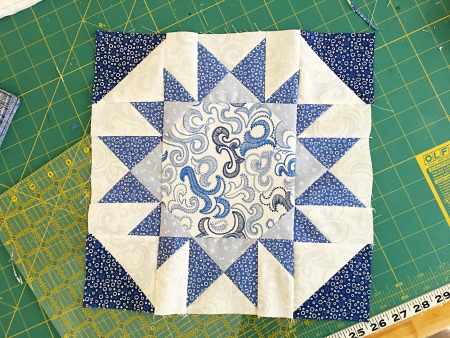
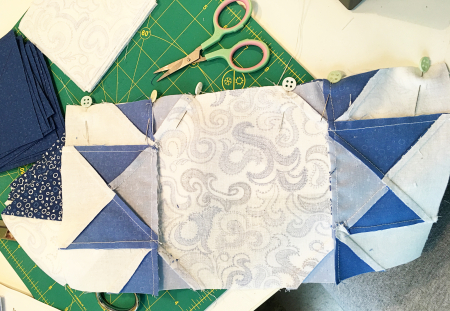
After sewing on the other side too, I have an “Almost” finished quilt block! I need to press all the seams so that it lies as flat as possible. Then I need to use the Omnigrid to find the best right angle side for a measurement of a 12 1/2″ square. Then trim along the Omnigrid to complete your first perfect 12 1/2″ square!! Trimming the edges so that it is a nice square makes all the difference!
And here is the completed first 12 1/2″ Quilt Double Dutch Square!! Yay!
Always, if you have any questions about quilting or making this quilt, don’t hesitate to ask!